In the ever-evolving landscape of digital content creation, having a unique and engaging online presence is crucial. One platform that has gained popularity among bloggers and content creators for its simplicity and flexibility is Ghost CMS.
Ghost CMS is a popular open-source content management system (CMS) known for its simplicity and focus on blogging. While it offers a variety of themes and customization options out of the box, you may want to take things a step further to make your blog stand out from the crowd. This guide will walk you through the process of customizing your Ghost CMS blog website, covering both basic and advanced techniques.
In this guide, we will explore how to customize your blog site in Ghost CMS. Whether you’re a seasoned web developer or a beginner exploring the vast world of customization, these steps will empower you to transform your Ghost blog into a true reflection of your brand.
You will learn from this Blog:
- Introduction
- How to install and activate a theme
- How to change the site title, description, and logo
- How to add custom CSS
- How to create custom pages
- How to add social media buttons
- How to set up Google Analytics
- Tips for Customizing
- Summary
Basic Customization Blog Website in Ghost CMS
- Choose a Theme: Ghost offers a wide selection of free and premium themes. Browse the Ghost Themes directory to find a theme that suits your style and preferences. Once you’ve chosen a theme, download it and install it on your Ghost instance.
- Customize Theme Settings: Most Ghost themes come with their own settings panel, allowing you to adjust colors, fonts, and other visual elements. Access the theme settings panel from the Ghost Admin dashboard.
We will cover a variety of topics, including:
- How to install and activate a theme
- How to change the site title, description, and logo
- How to add custom CSS
- How to create custom pages
- How to add social media buttons
- How to set up Google Analytics
1. Install and Activate a Theme
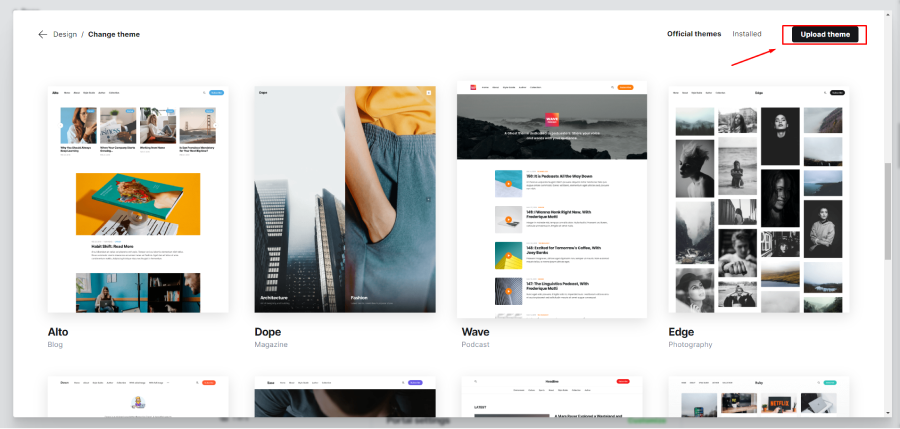
Ghost comes with a few basic themes, but there are also many third-party themes available. To install a third-party theme, you will need to download the theme file and then upload it to your Ghost blog.
Once you have uploaded the theme file, you can activate it by going to Settings > Design & Branding then click on the Change Theme option in your Ghost dashboard.
2. Change the Site Title, Description, and Logo
To change the site title, and description, go to Settings > General the section in your Ghost dashboard. The site title is the name of your blog that appears in the browser tab and search results. The site description is a brief overview of your blog.
To Change the Logo, publication icon, and cover image go to Settings > Design & Branding. The logo is the image that appears in the header of your blog.
3. Add Custom CSS
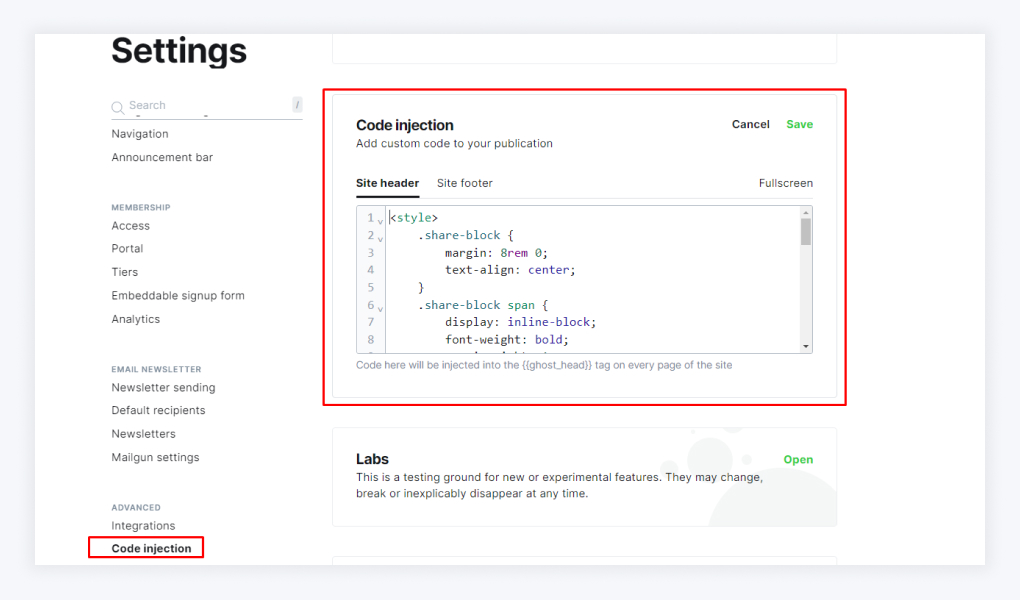
To add custom CSS, go to Settings > Design > Code injection in your Ghost dashboard.
Custom CSS allows you to make changes to the appearance of your blog that are not possible with the theme settings. For example, you can use custom CSS to change the font color, font size, and padding of your blog posts.
4. Create Posts and Pages
Creating posts and pages in Ghost CMS is a straightforward process, allowing you to manage your blog content effectively. Here’s a step-by-step guide for each:
Creating a Post
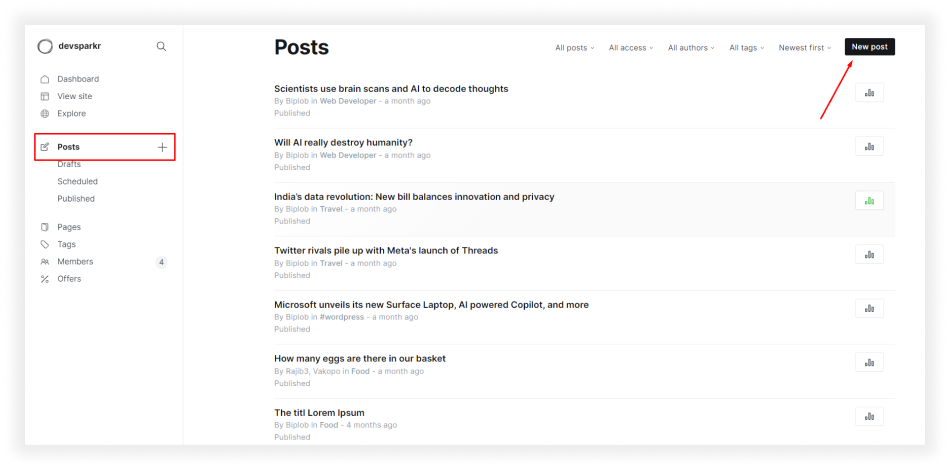
- Access the Post Editor: Navigate to your Ghost dashboard and click on the “New Post” button in the top right corner.
- Add Post Title: Enter a concise and informative title for your post. This will serve as the headline and anchor for your blog entry.
- Craft Post Content: Utilize the rich text editor to compose the body of your post. Insert images, videos, and other media elements to enhance your content.
- Set Post Status: Choose whether the post should be published immediately or saved as a draft for further editing.
- Assign Post Author: Select the author of the post from the list of available contributors.
- Add Post Tags: Categorize your post by adding relevant tags. This helps readers easily find related content.
- Select Post Feature Image: Upload or choose an image to represent your post visually. This image will appear on the homepage and blog listings.
- Preview Post: Before publishing, preview your post to ensure it looks and functions as intended.
- Publish Post: Once satisfied, click the “Publish” button to make your post live on your blog.
Creating a Page
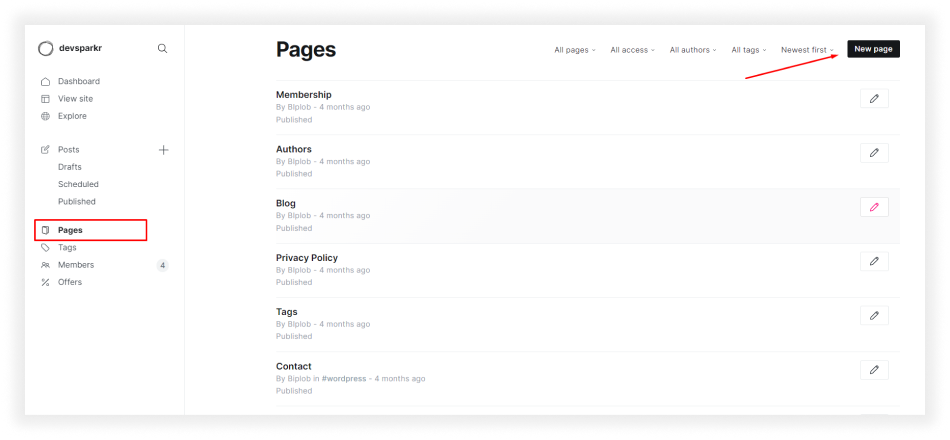
- Access the Page Editor: Navigate to the “Pages” section in your Ghost dashboard.
- Start a New Page: Click on the “New Page” button to begin creating a new page.
- Add Page Title: Enter a clear and descriptive title for your page. This will identify the page’s purpose and content.
- Craft Page Content: Utilize the rich text editor to create the content for your page. Add text, images, and other elements as needed.
- Select Page Slug: Choose a unique and memorable slug, which is the URL-friendly name for your page.
- Set Page Status: Decide whether the page should be published immediately or saved as a draft for further work.
- Assign Page Author: Select the author of the page from the list of available contributors.
- Preview Page: Before publishing, preview your page to ensure it looks and functions as intended.
- Publish Page: Once satisfied, click the “Publish” button to make your page accessible to your readers.
5. Add Social Acconts
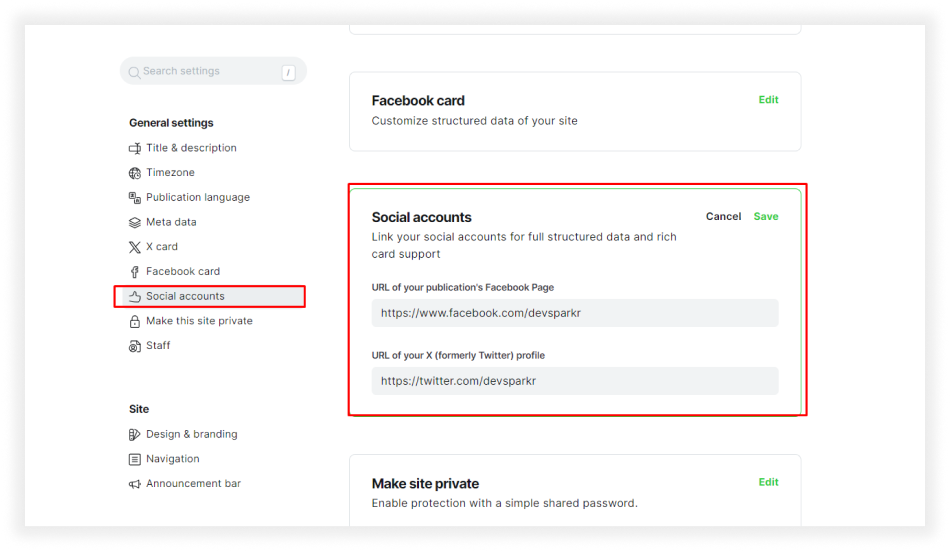
Adding social media accounts to your Ghost CMS website can be done directly from the Ghost dashboard using the built-in navigation menu. Here’s a step-by-step guide:
Add Social Media Links:
- Log in to your Ghost CMS admin panel.
- In the “Primary Navigation” area, click the “Add item” button.
- Enter the name of the social media network, such as “Twitter” or “Instagram,” as the “Label”.
- Paste the URL of your social media profile in the “URL” field.
- Click the “Save” button to add the social media link.
By following these steps, you can easily add social media accounts to your Ghost CMS website and enhance your online presence.
6. Set Up Google Analytics

To set up Google Analytics, you will need to create a Google Analytics account and then get your tracking ID. Once you have your tracking ID, you can add it to your Ghost blog by going to Settings > Code injection in your Ghost dashboard.
Advanced Customization
- Modify Theme Templates: For more in-depth customization, you can modify the theme’s Handlebars templates. These templates control the layout and structure of your website’s pages.
- Create Custom Widgets: Widgets are small modules that add functionality to your sidebar or other areas of your website. You can create custom widgets to extend the capabilities of your blog.
- Integrate Third-Party Services: Ghost allows you to integrate with various third-party services, such as Google Analytics, MailChimp, and Disqus. This integration can enhance your blog’s functionality and user experience.
- Develop Custom Themes: If you have advanced web development skills, you can create your own custom Ghost theme from scratch. This gives you complete control over the look and feel of your blog.
Tips for Customizing Your Ghost Blog
Here are some tips for customizing your Ghost blog:
- Start with a theme that you love and that matches your brand.
- Don’t be afraid to experiment with different colors, fonts, and layouts.
- Use third-party integration or plugins to add additional functionality to your blog.
- Get feedback from others on your blog’s design and layout.
- Back up your Ghost installation regularly to avoid data loss.
- Seek help from the Ghost community if you encounter any issues or need guidance.
Summary
In summary, Customizing your Ghost CMS blog is not just about aesthetics; it’s about crafting an online space that resonates with your audience and sets you apart in the vast digital landscape. As we conclude our exploration into the world of Ghost CMS customization, remember that the true essence of your blog lies in the unique elements you bring to it. Whether it’s tweaking the layout, experimenting with colors, or integrating third-party tools, every customization adds a layer to the story you’re telling. So, embrace the creative journey, push the boundaries of design, and let your Ghost CMS blog become a digital masterpiece that not only showcases your content but also reflects your personality and vision. The customization journey is ongoing, and as you evolve, so too will your blog – a dynamic, ever-changing canvas that continues to captivate and engage your audience. Happy customizing!
FAQs
Do you have any questions about How to customize your blog website in Ghost CMS? We have answers to some frequently asked questions on the topic.
Do I need any coding experience to customize my Ghost CMS blog?
While some customization tasks require coding knowledge, many aspects can be accomplished without coding experience. Ghost CMS provides user-friendly tools and settings for basic customizations.
Can I create my own Ghost CMS theme from scratch?
Yes, but it requires proficiency in HTML, CSS, and JavaScript. Familiarize yourself with Ghost CMS’s theme guidelines and best practices before diving into custom theme development.
How do I change the theme of my Ghost CMS website?
Changing the theme of your Ghost CMS website is straightforward:
- Navigate to Settings > Design and Branding in your Ghost CMS admin panel.
- Click on “Change theme.”
- Select the desired theme from the available options or upload your custom theme.
- Click on “Activate” to apply the chosen theme.
Biplob Ariya
Hi, This is Biplob Hossain. I am professional content writer. I successfully wroten a lot of content about Web development topics. I am also good web developer.
Related Articles
Article featured image
 13 min read

•
Ghost
How to create a Ghost blog website from scratch
Craft a captivating blog with Ghost CMS: A comprehensive guide for beginners to establish their online presence with ease.
Updated on — 30 Jan, 2024
Article featured image
9 min read
•
Ghost
A beginner’s guide to use Ghost CMS in 7 Steps
Learn how to create your own blog using Ghost CMS, a powerful and easy-to-use content management system. This beginner's guide will walk you through the steps of installing Ghost,...
Updated on — 30 Jan, 2024
Article featured image
 6 min read
•
Ghost
9 Reasons Why Choose Ghost CMS for Your Blog Website?
Ghost CMS is a fast, secure, and simple CMS specifically designed for blogging and publishing. Learn why Ghost is the best choice for your blog or website in this...
Updated on — 30 Jan, 2024